We came up with the MTB helmet lights guide for those seeking to invest in their first light just in time for the winter. The best thing about night riding is that it gives familiar trails a brand-new dimension, and it’s a fantastic way of extending your paddling period; use this manual to select the suitable lights for you!
- Part 1: A Detailed Introduction to Helmet Mounted Bike Lights
- Part 2: Advantages and Disadvantages of Mountain Bike Helmet Lights
- Part 3: Buying Guide for Helmet Mount Bike Lights
- Part 4: A few Words in Conclusion
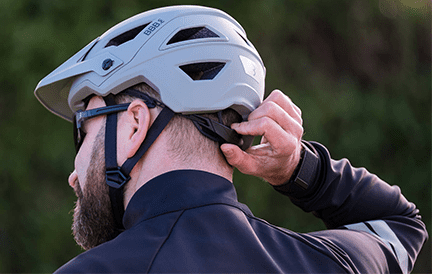
Part 1: A Detailed Introduction to Helmet Mounted Bike Lights
Let us not let the gloomy mornings and nights deter you from going for a ride. You can ride faster as well as far enough all through the winter with the best MTB helmet lights and feel the adrenaline rush of night riding. To give you the best off-road night riding experience, pair the best MTB helmet lights with another of the best mountain bike lights positioned on the handlebar. The handlebar light illuminates where you are looking, but your helmet light is vital for visually inspecting the front of the trail so you can see and foresee corners and other trail attributes. Many riders prefer helmet-mounted light tracks everywhere they look: around a switchback, on a rough patch of trail, etc. Helmet-mounted lights, on the other hand, can feel heavy on the head, which some riders find difficult to adjust to.
Precautions
Keep in mind that if you use a helmet-mounted light, you will have to either clasp the battery pack to the helmet or store it in a jersey pocket, which can disturb your trail flow. Commonly, lights are attached to a vented helmet with Velcro or elastic straps. Helmet-mounted lights will glow brightly down on the trail, which is great for removing shadows but reduces the distance the light will travel.
When deciding which mountain bike light to purchase, the following four factors should be kept in mind: runtime, lumen, beam pattern, and extras. For very good riding, a light output of at least 1,500 lumens is required. You could get away with less, but more lumens are better than less if you ride quickly or on technical trails. Varying the operating duration of LEDs reduces the amount of energy they need. The beam pattern refers to how the lights disperse light across the pathway. It’s as important as lumens. Lights usually have a spot or flood pattern. Spot patterns call attention to nearby features. Flood patterns distribute the light across a broader area, allowing you to see more clearly. Some lights employ both. A lengthy connection is required to connect the light to many bikes or the battery pack. All of this requires attention!
Part 2: Advantages and Disadvantages of Mountain Bike Helmet Lights
As the name implies, a bike helmet light is a type of bicycle light that attaches to the helmet. Many newbies are baffled as to whether or not this gadget is safe to use as a bike light.
Helmet lights are incredibly beneficial for off-road riding because the light follows your movements. When you need to see how to assemble it for the next spin, the lights on the bike will still be beaming straight ahead. The light may catch a rider’s eye on the road, and you could possibly even flash the light into their eyes momentarily to get their attention. Although that is not something we would suggest. It blinds the rider, or even worse, another bike rider approaching you on a dark trail, and they feel like a camera flash is flashing in their eyes. To prevent accidentally flashing people when you don’t mean to, you will need a lot of practice. In an urban area, it may be overlooked in the light cacophony and dismissed as a lamp post or sign since it is too high above the street.
From this point of view, a car light mounted on a helmet provides the illumination that riders seek while also serving as a more reliable indicator that they are riding a vehicle. At crossing points, cars approaching from the left or right frequently rely on the light on the road ahead of them to determine whether or not a vehicle is approaching on the crossing street.
Advantages of Helmet Lights for MTB
An MTB helmet light’s main benefit is that it can bring to light any particular area. When riding a bicycle on a mountain trail, the light will plainly indicate the path you’re looking at, which is a huge benefit. A bike helmet light, when coupled with the bike’s lights, can help you see more details than you normally would.
On the other hand, bike helmet lights on the rear end are incredibly helpful because they increase your visibility. When visibility is decreased due to bad weather or haze, this is particularly important.
There are two kinds of rear bike helmet lights: static or flashing. Flashing lights, in our opinion, are better because they use the battery more efficiently. A flashing rear bike helmet light will also draw more attention when coupled with an under-the-saddle reflective surface and a strong static rear light mounted further down the bike.
Disadvantages of Helmet Lights for MTB
When it comes to the major drawbacks of bike helmet lights, if used as the sole light source, a front light can easily confuse a driver or another cyclist.
The majority of riders predict to see a vehicle’s light from a certain peak. This is why it is so easy for drivers or cyclists to misinterpret it as a landscape light and only notice you when it’s too late.
It is advised that the front bike helmet lights be used only for off-road cycling because if you are on a crowded road, a front bike helmet light might blind the bike rider too. This could be extremely hazardous for you and for everyone else on the road as well.
Even though strongly suggested, the rear bike helmet lights have the limitation of being too tiny.
In fact, the majority of rear helmet lights are LED lights, which are vibrant and noticeable from afar but are too small. This may cause confusion among drivers, who may believe you are much further away than you actually are. Use a larger, brighter light on your bike to prevent misunderstandings. Both lights should have an equivalent light output.
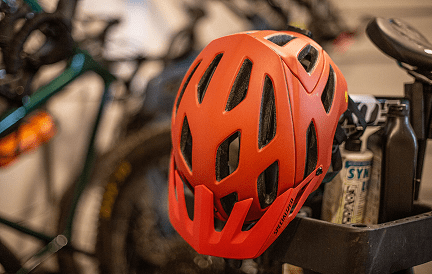
Part 3: Buying Guide for Helmet Mount Bike Lights
Whether you ride a bike to your work or like to have fun in the mountains, a good pair of lights can make things easier for you, especially in the winter months when the sun sets sooner. Bicyclists may select from little emergency lights to systems that can turn darkness into day. Your aims dictate your needs. Mountain bikers, in particular, require powerful lights to illuminate the trails ahead of them. Light MTB Helmet can easily produce over 800 lumens, making them so bright that you shouldn’t look directly into them. This buying guide is intended to facilitate you in purchasing the best lighting options for your needs.
Light Emitters
It’s hard to find a big bike light manufacturer nowadays that doesn’t use LED lights, which is sensible considering their efficiency and reliability. Avoid low-cost halogen and HiD-based systems because they consume a lot of energy and produce a lot of heat. Count the number of lumens to make a comparison between the light output of different light systems. Companies usually guarantee rival companies’ lumen counts are inaccurate, but that is still a good place to start from.
To ride trails at night, you will need at least 400 lumens; it will be sufficient to see the trail, but you will have to ride slowly. 750–1,000 lumens are generally adequate for most riding scenarios, which include technical trails and reasonably fast descents. Furthermore, you can purchase lights with a brightness of up to 6,000 lumens.
Aside from lumen counts, the beam pattern is critical. The simplest pattern circles around one LED bulb, although most of the light is spent on the trail’s edges. This kind of light is helpful for filling your field of view while accentuating what’s ahead. A well-designed beam pattern on a bar-mounted light system nearly makes up for the lack of eye-following on a helmet-mounted system.
The majority of lights allow for modification, however, we found that one or two lights are adequate. Most rides benefit from the high mode, whereas commuting and late-night rides benefit from the strobe mode.
Importance of Batteries
Because the battery is at the core of any lighting system, it’s critical to prioritize performance and trustworthiness. Most mid-to-high-end light systems come with a rechargeable Li-ion battery, whereas lower-cost models may come with NiMh batteries. Charge duration can range from 2.5 to 10 hours, so keep an eye ahead of time. There is nothing worse than not charging your light the day before you go for a ride. To get the most out of your battery, make sure to charge it according to the creator’s manual.
Increased battery life comes at a price. These batteries are heavier and cost more. On high, look for durations that are at least as long as your standard ride, which is 2 hours minimum. For the comparison of these systems, a basic ratio of maximum lumens to run time on high can be useful.
The second light is more productive if the other criteria like battery size and weight stay constant.
No need to buy used bike lights unless you can check the run time since batteries deteriorate and technology changes rapidly.
Usage of Tail Lights
Even if you don’t anticipate traffic, a flashing red tail light is usually a smart idea.
Choose a bright, low-cost light you can quickly attach to your hydration pack or seat post.
Part 4: A few Words in Conclusion
Keep in mind that incorrect connections, batteries, or chargers might create a fire.
If you frequently ride at night, you’ll need a light that changes instantly. Larger batteries and longer run times need longer charging times.
We hope this article was able to clarify all that you had in mind about MTB helmet lights. Now go out there and shine on!