Braking your mountain bike can seem very easy until you do it wrong and sustain injuries. In this article, you will learn the correct way to brake, the types of MTB brakes your mountain bike needs, when you should bleed your brakes and how to brake when riding downhill.
- Part 1: MTB Braking Tips for Beginners
- Part 2: Types of MTB Brakes
- Part 3: Types of Mountain Bike Brake Pads
- Part 4: How Often Should MTB Brakes Be Bled
- Part 5: The Correct Way to Brake Your Mountain Bike Downhill
Part 1: MTB Braking Tips for Beginners
Here are simple braking tips for mountain bike beginners to learn the correct way to brake.
The Position of Your Brakes
The first thing you need to know is putting your brakes levers in the right position. It is important to have your brake levers in the neutral position, which is 45 degrees angle downward to horizontal, the angle of your brake levers determines the position of the body on the bike. It helps you keep a straight wrist for power and control. You can always fine tune to adjust to your riding style and conditions. The brake levers should not be too close to the grips. To achieve optimal leverage, one finger should rest on the outer end of the lever. Have your lever form a straight line with your hands, this prevents your wrists from bending too much and helps you maintain a comfortable position.
Brake With One Finger
Braking with one finger allows you to brake without hesitation and have maximum grip on your bars at all times. Keeping three fingers and a thumb on the bar allows you more control of your bike. It makes your hands more secure and balanced on your bike. Always brake with one finger so you can brake as quickly as you need to. It could be either the pointer finger or the middle finger, depending on your choice.
Avoid Skidding
You may think skidding is the fastest way to stop your bike, when you skid on your bike as a beginner, you don’t have as much control over your bike. It could cause you to lose control of your bike. Skidding causes your bike tires to wear out because when you skid, it causes the wheel rotation to lock up and drag in the dirt.
It can dig into trails, causing trail erosion.
Don’t Pull Your Brake Levers
Pulling hard on your brakes can instantly lock your wheels, which could cause injuries, especially when using your front brake. Gradually squeeze, progressively applying pressure to help slow you down. There are techniques called; the feathering technique and modulating brake technique which will be talked about.
Brake Before Corners
You should brake before corners, not in corners. Corners are used to generate speed. Reduce your speed before entering corners to help you navigate. Doing this correctly will enable acceleration through the turn. In the case of entering a corner at a high speed, refrain from using your front brake. This could cause your front tires to wash out and start sliding. If you must brake in corners, use your rear brakes instead.
Front Brakes to Stop and Rear Brakes to Slow down
Your front brakes contain the bulk of total braking power, while the rear brake only contains about 25%. Because your front brake takes most of your weight. Front brakes would cause you to stop at a much shorter time than your rear brakes, but your rear brakes are used for controlling your bike, by allowing you to steer and brake at the same time, But for maximum power, Use both brakes. First apply the rear brake, then the front brake. To practice your braking and control, find a trail you are familiar with and practice till you get it right.
Body Position Matters
Your body position plays an important role in the effectiveness of your brakes. You may lose balance if your body is too far forward, leaning too far backward may cause your front brakes to lose effectiveness. Your weight should be just behind the center of the bike, so your hips and butt are just behind the saddle. Your arms, shoulder, and hips should align.
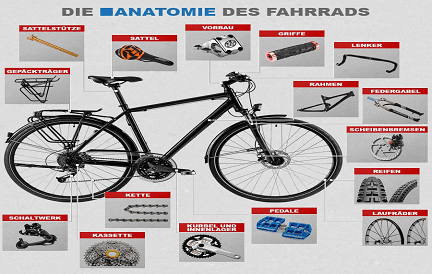
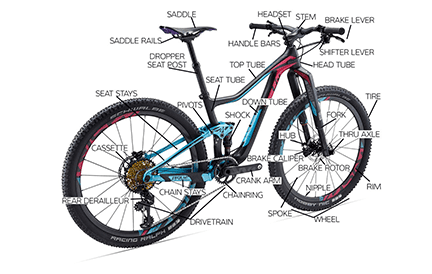
Part 2: Types of MTB Brakes
There are dominantly two types of brake systems for mountain bikes; disc brakes and V- brakes. There is no clear indication that one is better than the other, they are both good mountain bike brakes. we are going to look at their advantages and disadvantages.
Disc Brakes
Disc brakes are the newer of the two brake systems and are found on most mountain bikes nowadays. There are two types of disc brakes; mechanical and hydraulic. The mechanical works with cables and the hydraulic uses fluids, when you brake, the pressure causes the fluid to move to the caliper, pressing the pad again the disc.
Here are the advantages and disadvantages of disc brakes.
Advantages:
1. They contain more stopping power.
2. Disc brakes do not wear down the rims of tyres.
3. Disc brakes have no tire size limitations.
4. Functions smoothly in wet weather conditions.
5. It is easier to remove tires with disc brakes.
Disadvantages:
1. Disc brakes are expensive.
2. Heavier than v-brakes.
3. Disc brakes require regular maintenance.
4. Exerts strain on hubs and spokes.
V-Brakes
V-brakes are also referred to as linear pull brakes and have been in existence before Disc brakes came into the picture, although V-Brakes are no longer as popular as they used to be on mountain bikes, some mountain bikes still use v-brakes. They have longer arms and give the rider better control.
Here are the advantages and disadvantages of V-brakes.
Advantages:
1. V-bakes are less expensive.
2. Exerts no strain on hubs and spokes.
3. V-brakes are easy to maintain.
4. Its components can be found all over the world
V brakes can be converted to disc brakes, but when the forks have disc mouths.
Essentially, both disc brakes and V- brakes are both good mountain bike brakes. When faced with conflicts on which brake for a mountain bike, you can choose either, based on personal preference, priorities, and budget.
Part 3: Types of Mountain Bike Brake Pads
There are two types of MTB disc brake pads; organic brake pads and sintered brake pads.
Organic Brake Pads
Organic disc brake pads are made of rubber, Kevlar, silica, carbon, and other things, held together by resin. Organic brake pads are quieter than sintered brake pads because they use softer materials. They are quick to bed-in, good initial bite at low temperatures, and also gives sharper braking.
Organic brake has many downsides which include; organic brake pads may lose power at high temperatures, they don’t function well in wet conditions.
Sintered Brake Pads
Sintered disc brake pads are formed from particles of metal fused together at high temperatures. Sintered brakes are less affected by heat and function well in wet conditions. They are more durable than organic disk brake pads and will keep working perfectly at high temperatures.
The downsides to sintered brakes are they can be loud, needs a while to warm up, take longer to bed in, and can be hard on rotors because they are made from hard material.
Part 4: How Often Should MTB Brakes Be Bled
Bleeding your brakes does not necessarily mean replacing the fluid, if the fluid is in good condition, it could be as simple as removing the air inside the system,
How often you should bleed your mountain bike brakes depends on the type of brakes you have, how often you ride, the distances you cover, and your riding style.
You may never need to bleed your brake if you have a mechanical disk brake. If you have good hydraulic disk brakes, you may still need to bleed, but not often.
If you ride mostly enduro and downhill, may need to bleed your brakes up to 3 times a year because the performance of your brake is crucial and you cannot overlook.
You may need to bleed your brakes once in a while if you ride cross country and forest trails. If you don’t ride frequently, you could bleed your brakes once every 3 years. When you don’t bleed your brakes, it could cause you to lose brake performance over time.
Here are signs indicating your brakes need to be bled. Some of those signs include;
– brakes leaking fluid.
– brakes feel spongy or squishy.
– brakes feel loose.
Make sure to introduce the correct brake fluid into your brake, as introducing the wrong one can cause ruin to your brakes and the internal seals.
Part 5: The Correct Way to Brake Your Mountain Bike Downhill
Not correctly braking your mountain bike brakes downhill can cause you to crash. It is very important to know how to brake correctly in order to control your speed, going too fast can cause you to lose balance and crash. Here are some guidelines on braking your mountain bike downhill.
Brake Only on Solid Ground
When riding downhill don’t be in a rush to grab the brakes. It is safer to just go with the flow in rough terrain than to brake. Only brake when you have a good surface to brake on that is rock and solid dirt, it gives your tires more traction. Braking on wet roots and loose soil is not advisable. When you brake on loose soil or wet roots, it disrupts your wheels and would not slow you down. Scan your surroundings and brake on a rough section.
Don’t Grab Your Brakes too Hard
Generally, it is not a good idea to grab your brakes too hard. Grabbing your front brakes too hard can cause you to flip over the bars and grabbing your rear brakes too hard could cause you to skid. As said earlier, it is ideal to gradually squeeze, progressively applying pressure to help slow you down. For best control, you could modulate your brakes, controlling the amount of clamping force, precisely and accurately or you could feather your brakes, alternating pressure lightly and rapidly. Practice either modulating or feathering brakes techniques.
Take on The Attack Position
Stand up on your pedals and slightly drop your heels below the pedal axle keep your knees and arms slightly bent, elbows up, wide above the handlebars. Your head should directly be above the handlebars. The attack position is a base position and can be used as a neutral position.
Use Both Brakes for Maximum Stopping Power
Everyone is saying it, and yeah it’s true. The front brake makes you stop at a much shorter time than your rear brake, so you may generally inclining to use it. But, if you want maximum stopping power, use both brakes. With both brakes, you will find yourself stopping at a much shorter time and give you better braking leverage. It will also prevent you from skidding and flipping over.
Keep Your Weight Back
As said, your body position when braking plays a very important role in the effectiveness of the brakes. Keep your weight back, when using your front or rear brakes, or even both. But don’t lean too far back. This may make your brakes less effective and putting your weight just directly over the front braking wheel makes your brakes slow.
While keeping your weight back, don’t tense up. Try as much as possible to relax.
Conclusion
Hopefully, you’ve been given the basics you need to know about MTB brakes. Please follow the tips for mountain bike braking, and braking mountain bikes downhill. Those tips will be really helpful, especially since you are an MTB beginner.