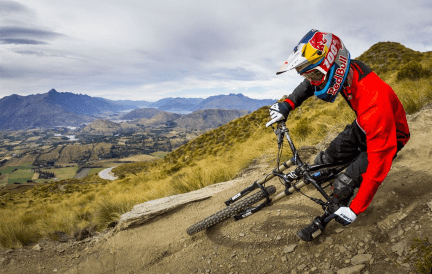
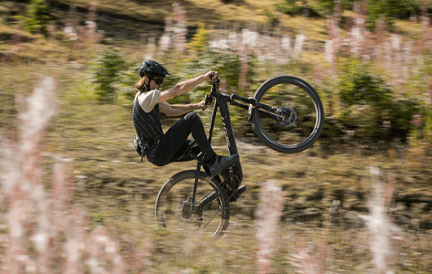
Downhill riding is a discipline of mountain biking performed on steep, rough terrain. It is different from the traditional mountain biking. It often features jumps, drops, and obstacles. It is intense, high-speed, and requires concentration and focus. Downhill riding involves biking on a descending slope. It requires technique, strength, and knowledge.
- Part 1: Downhill Riding
- Part 2: Downhill Riding Tips for Beginners
- Part 3: Downhill Riding Gear and Their Uses
- Part 4: The Difference Between a Mountain Bike and a Downhill Bike
- Part 5: How to Ride Downhill
Part 1: Downhill Riding
Downhill riding is an exciting sport, with the proper equipment and gear, downhill is downright fun. Most downhill bike parks offer beginner’s lessons and it is a great way to challenge yourself.
Riding a bike downhill engages every part of your body, including your brain. This genre of mountain biking is packed with many benefits.
The Trails
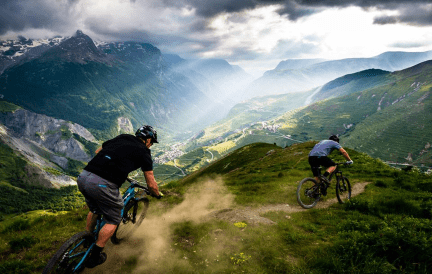
Downhill trails are steep, rough, and challenging. There are lots of gaps, corners, rocks, roots, and jumps. A majority of them are professionally designed and constructed, with machine graded turns for optimal speed.
The trails can either be natural or professionally built, but either way. It is for being exhilarating and challenging. It is always good to check out trails before riding on them. The main places to find downhill trails are ski resorts and bike parks. Ski resorts usually have facilities for Dh riding and bike parks have trails based on skill level.

Part 2: Downhill Riding Tips for Beginners
Here are downhill riding tips every beginner should know.
Set Up Your Bike
The first thing you should do when riding downhill is set up your bike. Make sure you set up your downhill bike correctly, by adjusting handlebar height, checking tire pressure, and the brake levers and rear shock setup.
The Handlebar Height
When raised, it will enable you to push your weight back and effectively push your front wheels into downslopes and obstacles. Don’t raise it too high, if you do, you will not be able to put your weight on the front wheels which will make riding difficult on steep trails.
Tire Pressure
Check your tire pressure to avoid punctures, and make sure your tires have the right pressure. So, some factors that affect your tire pressure, are;
Your Weight
The heavier you are, the more pressure you have to run. A lighter rider will run under less pressure than a heavier rider.
The trails you ride on, and your riding style
If you frequently ride on technical terrains with more obstacles, you’ll need to run higher pressures to protect your rims and tires.
The set up of your bike, tube, or tubeless.
Tubeless setups run lower pressures than those with tubes because there is no tube to pinch between an obstacle and the rim.
Be sure to put these into consideration when setting your tire pressure.
Brake Levers
Since downhill often requires you to stand, you need to adjust the angle of your brake levers, to reduce fatigue, and have a more comfortable arm and hand position. To find a good position for your brake levers, sit on your bike, loosen your brake levers, move them in different positions until you find the one you’re comfortable with, then tighten them up. Remember to angle your levers on the bar between 10-40 degrees downwards.
Rear Shock Set Up
For downhill riding, your rear shock would work best on 30-35 percent sag. You can increase or decrease the sag through air pressure, or spring change. To set your shock sag correctly for downhill, refer to your bike manufacturer.
Start with the Easiest Trails
Don’t immediately get on harder trails, start with the easiest trails then progress when you feel you have mastered them. Starting with harder trails as a beginner could be dangerous, you should first learn how to navigate easier trails.
Body Position
Body position is critical when riding downhill. Keep your arms and heels slightly bent, this will allow them to act as extra suspension. Relax your arm and leg muscles to help you maneuver and soak up bumps.
Keeping your weight back helps you maintain balance on your bike, don’t lean too far back so you will not unweight your front wheel, you also need balance for braking.
Relax your arm muscles to help you maneuver easily and your leg muscles to help you soak up the bumps. Don’t lock out your joints, so you’ll be able to react to the terrain.
Brace your feet against the pedals to help you maintain stability.
Stand up in a centered position, shift your hips back slightly, open elbows, look straight ahead, keep heels slightly bent, and lower your chest and hips to build traction.
Look Straight Ahead
This may seem easy, but you may be tempted to look down or just in front of you. Keeping a leveled eye position can help you read and understand the terrain better. It allows you to foresee the trail and react quickly. Seeing obstacles before you reach them can save you severe injuries. With eyes ahead, you’ll never be caught off guard.
Practice One Finger Braking
The correct way to brake is with one finger. This allows you to brake without delay, and maintain a maximum grip on your bars. One finger braking allows you more control of your bike and makes your hands more balanced and secure. Your hands need to make a fist around the grips, to maintain an excellent hold on the handlebar and not get tired.
Be Acquainted with Your Brakes
Brakes are not only used as a recovery measure when going fast, they can also be used to control speed and direction.
Braking is important in any mountain bike discipline. You must learn to brake lightly, and precisely. Gradually squeezing and progressively applying pressure. Feed your brakes gently, and modulate by controlling the amount of clamping force, precisely and accurately over the front and rear brake.
When riding downhill bikes on steep roads, don’t be in a rush to grab your brakes. Brake only there’s a good surface to brake on. That is rock and solid dirt. Braking on wet surfaces or loose soil would disrupt your wheels.
Riding Dh as a beginner, you may want to panic and squeeze your brakes. Don’t, it isn’t a good idea. If you must brake, brake lightly.
Overall, you can increase your speed by using your brakes, maintaining control, and making use of the terrain for maximum performance.
Weight Distribution
Your weight should be distributed to the outside of your bike as you turn. This will prevent you from cornering too sharply and falling off your bike. Evenly distribute your weight between your front and back tire when turning.
Always Use Riding Gear
Downhill riding requires body protection. Your riding gear will protect you in the event of a crash. You won’t feel uncomfortable and it won’t restrict your movements.
Always use your riding gear when DH riding.
Part 3: Downhill Riding Gear and Their Uses
Downhill riding gear are essential kits to protect you when riding. As a downhill beginner, you’ll need:
Full Face Helmet
To protect your head when riding at high speed downhill. When buying, pick the correct fit. Chin straps are also recommended for security. Pair up with a washable liner.
Goggles
Goggles protect your eyes from soil, rocks, dirt, and mud. You may get hit in the face by these, as speeds in Dh are high. Check for well ventilated lenses and carry your goggles bag, to wipe them if they become dirty while riding.
Shorts
There are shorts specific for Dh which offer stretch panels and fabrics that don’t wear easily. They are great for warding off abrasions in case of a crash.
Gloves
Cover your hands at all times when riding. Gloves will also help improve your grip and keep better control of your bike.
Body Armor
Body armor is a personal choice, however, it is recommended to use elbow and knee pads. When buying, check for pads with removable protection as those are washable.
Part 4: The Difference Between a Mountain Bike and a Downhill Bike
Here is the difference between downhill bikes as well as the traditional mountain bike.
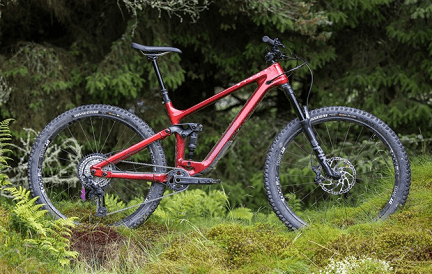
Downhill Bikes
Downhill bikes like most mountain bikes usually feature 27.5/650B and 29-inch wheels. Downhill bikes are great for technical terrains, so, they have stronger rims that do not deform on impact.
Downhill bikes are more durable, with a full suspension and extra travel to reduce impact and shock. Also, they are excellent at overcoming rough terrains at high speed. Downhill bikes are built to withstand rough riding and terrain, since avoiding obstacles in Dh racing is inevitable, and riding is usually done at high speed both the rider and the bike are bound to be thrashed. Downhill bikes are heavier than the traditional mountain bike, and the frames are made from hard materials, mostly carbon fiber, titanium, and steel. The forks on a downhill bike usually consist of a double crown, for extra rigidity and strength.
The frames of downhill bikes have a slacker geometry, which places the rider’s weight far back.
Mountain Bikes
Mountain bikes, on the other hand, have lighter frames and may have just rear or front suspension, or a rigid fork depending on the rider’s preference. Compared to the DH bike, mountain bikes are less capable of absorbing shock and are easier to maneuver than downhill bikes because they are lighter. Mountain bikes are less durable than downhill bikes.
Part 5: How to Ride Downhill
Downhill riding is really hard, exhilarating, and fast. Here is how to ride your bike downhill.
Keep Your Weight Back
Body position matters a lot when riding downhill, and although the bikes have made it easier to push back weight with slacker geometry, it is still possible not to assume a correct body position.
Keep your weight back, but don’t lean too far backward.
This is easier said than done, but when Dh riding,downhill you have to try as much as possible to relax your body. In downhill, your arms and legs serve as extra suspensions, you have to be relaxed for you to maneuver your bike and feel the terrain.
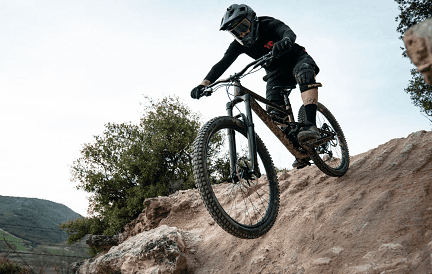
Take on the Attack Position
The first key to downhill riding is taking on the attack position. You have to stand up on your bike, keep your arms and knees bent slightly, and your elbows up. The attack position is a neutral downhill position.
Braking
As said in the previous article on Mtb brakes, you should use both brakes for maximum stopping power. As you descend, your bike shifts your weight forward. Using only your front brakes could cause you to lose balance and flip over the bars. Even if you want to use only your front brakes, use them on only straight sections. Remember front brakes stop, rear brakand es slow down.
Don’t brake when approaching obstacles. It’s hard but allow your bike to roll it out. Braking on obstacles will make you lose control. Also, don’t grab your brakes too hard and try as much as possible to limit braking downhill.
Level Your Pedals
Your bike pedals should be at 3 and 9 o’clock respectively, this leveled pedals puts you in the perfect position to pump your bike. It transfers the weight of your body from the pedals to the wheels and suspension.
Hit the Gym
If you are serious about downhill bike riding, you should hit the gym. Downhill riding requires strength and agility. There are specific exercises that would help boost power and increase your energy levels.
Conclusion
Riding downhill is not always easy, especially as a beginner. We hope these tips, on how to brake downhill and downhill mountain bike gear, will help you overcome your fears and ride like a pro. You will find that downhill mountain bike riding is fun and adrenaline filled, and it is also good for your health.