If you want to get the most out of your trail riding as the sun goes down then this article is for you. Here you’ll find info to choose the right mountain bike helmet light you need to boost your visibility as you tear up the trails.
- Part 1: What Mountain Bike Trails Should I Try with My Helmet Lamp Mtb at Night
- Part 2: How Bright Does My Bike Light Need to Be for Trails
- Part 3: Why Is the Beam Pattern Important for Helmet Lights
- Part 4: What Kind of Mountain Bike Helmet Light Mount Works Well
- Part 5: What Kind of Battery Do Helmet-mounted Lights Use
- Part 6: Are There Any Extras I Should Consider
- Part 7: Share Your Helmet Lighting While Mountain Biking with Friends
- Part 8: Conclusion
Part 1: What Mountain Bike Trails Should I Try with My Helmet Lamp Mtb at Night
Most people spend time riding their bikes for commuting, recreation, or exercise. If you’ve spent time riding out of town, off-road, maybe even experimenting with different routes adventuring home then you’re one step closer to the experience you’ll be sure to get addicted to… mountain biking, especially at night.
You should always be safe when trying out a new activity. Extreme sports like mountain biking definitely require some safety precautions, which is why many trails, and parks follow an almost universal grading system you can use to progress from easy to extreme. You can equip yourself with pads and helmets to keep yourself safe. If you’re blazing down a trail at night, a mountain bike helmet light is a must-have.
When riding at night (or dusk), high-performance mountain bike lighting is extremely important to make your next mountain bike adventure an adrenaline rush you’ll never forget, even if you’re riding the same trails over and over. If you ask around, night riding is a whole new experience.
With the right lighting setup, you won’t be spending much time looking for a path to follow in the dark. You won’t have to wonder where the trail went either. As you twist through trees, ride across wooden bridges, and jump over cliffs (one day you could very well be doing that) having a high-definition experience is a priority for you and other brave warriors. But you don’t have to start there.
Start With Your Handlebar and Mountain Bike Helmet Light on
- Start with routes you know well.
- Choose trail at your level (green is easiest, black is hardest): Green, blue, red, and black.
- Ride the trail as you normally would with your lighting on.
- Ride with a friend, but be careful not to ride too close creating a shadow.
Part 2: How Bright Does My Bike Light Need to Be for Trails
Mountain bike helmet lights need to be bright enough to provide focused, high-definition lighting wherever your head turns. Depending on your speed down the hill you’ll need a light that will allow you to react to turns, bumps, or bridges, even friends you might be sharing the trail with. So how much light do you actually need?
The standard measurement for brightness is lumens. Think of one lumen having the equivalent brightness of a single candle and you were standing a foot away. If numbers work for you, 1 candlepower equals 12.57 lumens.
How much mountain bike lighting do you need to see and be seen
- Riding in the city with front and rear blinky lights. 20-200 lumens is enough.
- Commuting through rural farmlands or sparse suburbs, or highways. Add a front headlight with 200 – 800 lumens.
- On the downhill mountain trail, you’ll need high-powered combined lighting. A front headlight and reliable helmet light for mountain biking will do it. 800+ lumens will easily light up your entire road or mountain path ahead.
Any lights you choose, you’ll want it to have bright LED lights to light up your immediate vicinity, even if there comes a time with you’re riding in total darkness surrounded by trees.
Multiple lighting modes will also be helpful to you. For example, when you’re crossing a road, stopping to talk with your friends, riding at dusk you’ll want to have the option to extend your helmet lamp’s battery life as long as possible. Look for lights with different modes so you can choose to continuously ride for 4 hours in high-brightness mode, 8 hours in mid-range mode, or 12 hours in low-brightness mode.
A high-powered, multi-purpose helmet light for mountain biking can be a useful and important investment. If your lights are detachable or mount the light in other places, it can be used as an emergency flashlight, put in the car, basement, attic, or emergency toolbox.
Part 3: Why Is the Beam Pattern Important for Helmet Lights
Beam patterns are important because you want to get the safest and best ride experience out of your light. Some lights focus on one particular area while other lights spread the beam out in a cone-like shape. If your beam is set to focus on one area, everything in that area will be brighter because of it.
Conversely, if your beam is spread out you’ll be able to see more around you, but turning your head to read a line or make a turn won’t make much difference. If you have a bright, focused helmet light for mountain biking you’ll be able to get the most detail possible wherever your head turns.
The biggest thing to consider is how your lights are set up. If you are running a dual-bar and lid-mounted setup (where you have a light on your handlebar and helmet), then you’ll have a brighter trail and better safety.
One of the best options is to have a high-powered bar-mounted light and combine that with a focused beam on your helmet-mounted light to get high-definition. If you’re not into that there are many helmet lamps to choose from that provide the option to toggle between spotlights and beam patterns. That’ll give you the best of both worlds.
Since you’ll be riding near dusk and even into the night, you’ll have the trail virtually to yourself. That means you won’t have to worry about how fast you’re going, or other riders. You’ll also have the opportunity to experiment and become a better rider. Night riding can be done by beginners and experts. The good news is that if you’re a beginner, night riding will be the opportunity of a lifetime for you. Experience old trails with a whole new adrenaline rush, and the right equipment.
Part 4: What Kind of Mountain Bike Helmet Light Mount Works Well
Mounting a light on your helmet will allow you to see wherever your head turns. There are a few mount designs that may work well with your helmet. Almost any mountain bike helmet light mount style will “work well”. As long as it can stay secured in one place you’re good to go. There are several important details to understand though:
- Spotlight beams are best suited as a helmet lamp.
- A cone-shaped, or floodlights will be best mounted on your handlebars.
- Some lights will allow you to toggle between lighting options (spotlight, or beam).
- Helmet mounted lights will either combine light and battery or not.
- You may have to think about placing a wire, or mounting a battery if they are separate.
Mounting can depend on whether or not your battery is combined with your LED light, or not. Some helmet lights for mountain biking will combine battery and LED light. So you can mount the one unit together. Other helmet lamps will have a separate battery, which means you may have to run a wire from a battery mounted below your handlebars, attached to your riding belt, or placed underneath your seat. If the helmet light and battery are separate, they will most likely come with extension cables. So you won’t have to worry about trying to mount the battery and light together. Weight can vary depending on the light from 20 grams to 300 grams.
Three Styles of Mounts for Helmet Lamps
There are several styles of mounting straps for mtb helmet lights. Almost every light requires no tools at all. On some, you only have to secure a rubber strap around any opening on your helmet and you’re good to go. Zip the velcro through two openings on your helmet, and press both sides together in whatever position you like.
- Velcro – may get dirty over time, through the dusty summer months
- Snap/twist on – the most secure style and easy to position, but may not be the easiest to position
- Rubber strap – easy to clean and position, not affected by the weather
Part 5: What Kind of Battery Do Helmet-mounted Lights Use
The range of batteries helmet-mounted lights use can vary quite a bit. Battery sizes, length of use, and manufacturing choices all vary. Choose your battery size wisely.
Some helmet lamps are still designed to require AA or AAA batteries. However, the majority of helmet lamps are designed with rechargeable lithium-ion batteries. The advantages of choosing a rechargeable lithium-ion battery are obvious. When your helmet light uses a lithium-ion battery you won’t have to constantly purchase batteries, or recharge old batteries. Lithium-ion batteries are also encased allowing for an entirely sealed, waterproof light.
Depending on the manufacturing and design choices batteries can last anywhere from 3 hours in the highest brightness mode and up to 12 hours in low brightness mode. Choosing a helmet lamp mtb that has different modes would give you the most adaptability for any situation, but it’s not necessary. Some helmet lights have low, medium, and high settings allowing you to adapt lighting brightness to your needs right on the trail.
The size of the battery matters too. It matters not only for the length of time that you can use the light, but charging time too. You’ll want a fast charging time in case you need to charge it on the way to the mountain. Get ready for the outdoors fast and move on to the next thing. Batteries for helmet mount lights can take anywhere from 1 to 5 hours to charge, depending on the size.
Recharging a lithium-ion battery in a mountain bike helmet light is done via a USB charging port in mist designs. The placement and rubber sealing will keep your battery safer from natural elements like dust, dirt, and rain. Some will also come with an indicator light so you can monitor battery life.
Part 6: Are There Any Extras I Should Consider
There are a few extras to consider when choosing a mountain bike helmet light. You may want the ability to remove the light from its mounting, effectively turning it into a flashlight. Water resistance, water-proofing, and durability are also important if you plan on hitting the mountain during the winter season in a temperate climate. Multiple light modes are important too. I know I’ve mentioned that earlier but it is extra and important. You should also look into what kind of guarantee any company is offering on their product. If they offer a guarantee, it means they stand behind their product. Good choice.
Multi-purpose helmet light: A detachable bike light allows you to turn your helmet lamp into a hand-held flashlight. With multi-function lighting modes (high, medium, low, flashing plus warning light, burst flashing plus warning light) you can use it in a variety of situations, or for safety/survival purposes (if necessary).
Water-resistance, water-proofing, and durability: There is a difference between water-resistance and water-proof. Waterproof mtb lights for helmets can withstand harsh weather conditions, have increased durability, and are generally a better investment if you plan on heading down the mountain throughout the year. All-metal frames (front light) can cope with severe bumps and falls.
Guarantees: Any seller that firmly believes their product is a good choice for daily riding, and we are committed to ensuring your 100% satisfaction is something to get behind. Make sure to check their refund/return policy before making any decision. You’ll want to order without worry.
Part 7: Share Your Helmet Lighting While Mountain Biking with Friends
Whatever mountain or track you choose, it’s best to go with friends wherever you ride. Mountain biking on trails you’re familiar with can make you familiar, comfortable, and confident. Night riding is much different but safe with friends and the right mountain bike helmet light and lighting setup.
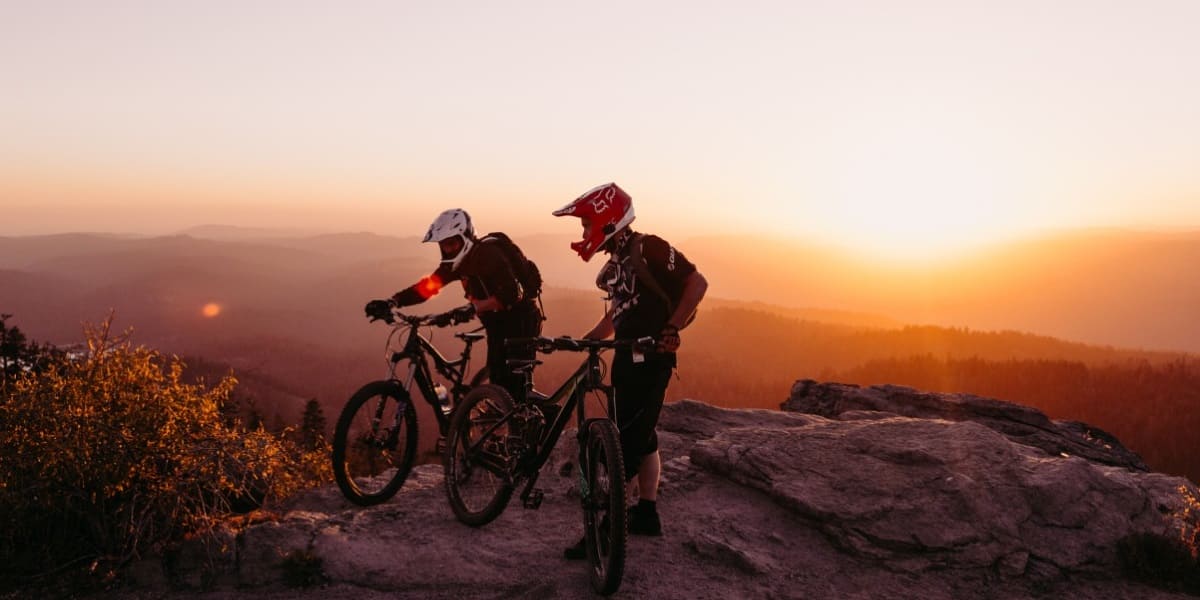
Night riding is a fun, exciting, and totally different world. Old paths will seem different and new. Everything will feel faster. Trees will fly by you, the ground will approach you quicker, and you and your friends will own the mountain. You’ll have it mostly to yourselves. Before you and your friends hit the trails at dusk consider these things…
You wouldn’t think about these but there are a number of changes that come with mountain bike riding at night.
You don’t want to ride too close to the person in front of you. If you’re too close your handlebar headlight, and mtb helmet lamp will effectively cast a shadow ahead of the rider in front of you if your light is brighter than theirs. This could cause some unexpected accidents. Remember, the likelihood of wiping out, or crashing is much higher while riding at night.
This will make what they’re riding much harder and could cause some unexpected accidents. On the brighter side, here’s a tip: if you stop to shoot the breeze mid-trail or turn talk to your friend at the end of the trail, be ready to turn off your mountain bike helmet light. You don’t want to shine the light directly into their eyes. Cheers!
Three quick safety tips when night riding with friends
- Combine a working rear light with a handlebar light, and helmet lamp for every trip.
- Always let someone know where you’re planning to go and how long you’re staying out.
- Pay close attention to your main and helmet light’s battery life.
- Wrap up warm, too – when it’s dark the temperature drops. Wear a spare layer.
- Make sure your helmet light batteries are fully charged before leaving home.
Part 8: Conclusion
Choosing the right mountain bike helmet light will boost your visibility while you blaze through old trails in an entirely new way. The right helmet lamp will set you on the path to get the most out of your trail riding as the sun goes down and even in the pitch dark.
When you first start at night, make sure to hit the trails you already know. They’ll seem new at night, but with the right lighting, you’ll have fun and stay safe. On the mountain, you need to have lots of light. You’ll need a floodlight on your dual-bars, and high-lumen helmet light for mountain biking. Moutainbikee has options for you to choose the light that’s right for you. Consider mounting, battery life and recharge time, and any extras you may want to include like durability and waterproofing.

