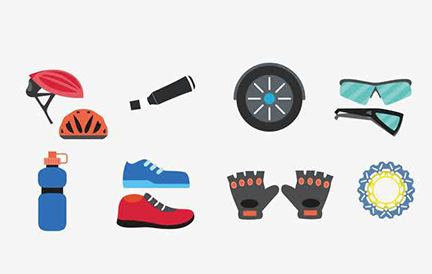
Having a mountain bike with super complete accessories will certainly be very fun. The mountain bike fenders 29 might be the one that fits the shape of your mountain bike. Here are some things about this mudguard that you need to know.
- Is Mudguard Important
- How to Determine the Right Fender
- Does Tire Size Really Affect Fender Selection
- Does the Length of the Fender and the Space between the Fender and the Tire Matter
- Is the Clip-On Fender Type Useful
- What Else to Consider Before Buying a Fender
- What is the best MTB fender brand
- How to Install Fenders
Is Mudguard Important
When winter comes or the rainy season has just ended, the topic that fellow drivers often discuss is the aspect of driving that is more practical and useful today. Questions like how to keep my body warm while driving, what kind of tires should I use, and most importantly ‘do I really need to put a fender on?’
You are a rare rider if you are more concerned with the aesthetic value of a racing bike in winter. Well, again, this is not summer. Never again do you ever think about the less cool or less sweet aspects of the bike, while entirely forgetting the vital aspects you should have throughout the winter to go down a muddy trail?
However, of course, you can ignore this strange thought when you start to think about how fenders can provide happiness for you when driving in winter. On muddy roads, any type of fender including the mountain bike fender 29 is not only able to prevent you from relentless splashes of mud from the tires, but this mudguard also keeps you out of the water and keeps your belongings and bike dry.
Why is it Necessary Install a Mountain Bike Fenders 29
Heavy rain won’t be a big problem for you as long as you use a mudguard. This will help keep the water out of the bottom so you don’t get too wet.
England, from day to day, shows a significant development in the cycling population. People in England began to join clubs or groups on expeditions. And they feel the benefits are so great from this activity.
With whatever club you join, they definitely recommend using mudguards when going on expeditions in winter. If you keep nagging and don’t do it. Then, you will forcefully place yourself in the very back position for sure. Your bare tires must be able to cause as little damage as possible or you will be kicked out of the club during the winter.

How to Determine the Right Fender
To be able to determine the right type of fender, then you must first know what type of bike you are using and for what needs. Do you have any type of mountain bike? Are you on an expedition in winter? If yes. Then, of course you should use the MTB-style mudguard type.
These units are usually designed to accommodate off-road or MTB bicycles. It has a beefy suspension and tire design. Thus you must install the mudguard higher above the wheel. The installation method is fairly easy, so it’s no wonder this fender is also very popular among commuter riders. This type of mudguard varies greatly, usually mounted on the bottom tube (for the front guard) or on the seat tube (for the rear).
There are many brands as well as specifications of the fenders available in the market. The best fenders are those that can block mud from getting out of the tire area but don’t make the tires heavy because of trapped mud.
The first thing you should look for when purchasing a mudguard is that it fits the diameter of your wheel. We rarely employ this design on a large scale. Typically, one style of the fender is only appropriate for specific tire size. For example, MTB fenders 29er will only go with tires that are 29 inches in diameter.
Does Tire Size Really Affect Fender Selection
Well, this has been touched on a bit in part two. Unfortunately, the explanation that lacks detail makes you probably not understand the explanation clearly. If you still don’t think that tire size may influence fender type selection. Please perform the installation at random, and we will see what happens. You can be sure that your face will get wet in a few minutes since the mud will quickly flow out of the fender and splatter everywhere.
Bicycles come in a wide range of styles. Because of the large variety of frame designs and sizes, people often need custom bike accessories. The traditional style fender, which uses bolts, definitely doesn’t fit all bike frames. So, measuring your bike before choosing a mudguard is something you must do. Do it carefully and carefully. The wrong buy, of course, will lose money. What you should measure is the tire radius, tire width, and frame clearance.
First, check the radius of your tires. Specifically for bicycles used on highways, gravel roads, commuting, and fitness utilizes the size 650b or 700b to indicate the size of the tire diameter. MTB-style bikes usually use sizes 26 inches, 27.5 inches, or 29 inches. So, check back. If it is 29 inches then you should go for mountain bike fenders 29.
Second, measure the width of your tires. This tire size may be determined from the information printed on the side of the tire. It is usually given by the tire maker. You must select a fender that is at least 8mm wider than the tire size. For example, suppose you have a 42 mm broad tire. As a result, it is advised that you select a fender that is at least 50mm broad. This creates some space between the tire and the fender.
Does the Length of the Fender and the Space between the Fender and the Tire Matter
Let’s say you have 29 inch mountain bike fenders, is just considering the width of the tires enough to produce good fender performance? Turns out that’s not the only thing you can do. To give good results, this is very important, especially if you are going on a trail in winter.
So you need to make sure that there is enough space to fit the fender between the tire and the frame. Ideally, the space between the tire and the frame is 20mm to 30mm. This also applies to the space between the bam crown and the fork to match the traditional fender type. Again, you have to make sure that the front fender has enough space to fit between the rail and the brake calipers. Then, the rear fender has enough space to fit between the seat and the calipers.
It is also important to measure the distance between the seats or the space inside the fork knobs and between the brake calipers. This is done to find out if your frame allows for a wide fender to protect your tires.
Some people may want fenders that look simple. As long as it is able to perform its function properly then this is fine. However, a longer fender can provide better protection for you, your bike, and your clubmates. If you want better performance with maximum coverage, then you can also add a mud cover on your 29 inch mountain bike fenders. This will make the fender slightly longer.
Is the Clip-On Fender Type Useful
When you want to buy bicycle fenders, for example, mudguards for mountain bike 29 inch, you must first see if your bike supports the installation. There are types of bicycle fenders that use the bolt-on method or screw in the eyelet near the fork and sprocket. This type of fender certainly provides maximum protection because the fenders don’t let go when exposed to shocks.
However, most road bikes, MTBs, and single-speed bikes do not have eyelets that can be fitted with full fenders. Well, if your bike belongs to that type, choose a bicycle fender that uses the clip-on method. Usually, these fenders are mounted on the seat post.
For those of you who want practicality, clip-on bicycle fenders are the most appropriate choice. If you don’t need it, you can easily uninstall it.
There are two types of clip-on mudguards available in the market. The first is the clamp-on type which is usually installed on the seat post. Some well-known brands that provide the best bicycle fenders of this type include Rockbros, Topeak, and Velo Orange.
There is also a more practical type of folding fender from the Ass Savers brand from Sweden. This type of bicycle fender does not need any external hooks, you just need to fold it like origami and hook it in the cavity under the saddle.
What Else to Consider Before Buying a Fender
First, the fender for the front tire of the bicycle. Well, this one is a bit difficult because you need full fenders to get maximum protection on the front tires. The difficulty also increases if your road bike does not have enough clearance.
Even though the splash point is right at the bottom near the pedal. As a result, the shoes will remain dirty. So, if you want to protect your shoes, you need to experiment a little to get the right fender. Even better if you add a mudflap to the full fender on your bike. However, if you want to protect the bidon as well as the center of the frame, the clip-on fender is sufficient.
The second is the bicycle fender material. This really depends on your finances, yes. Match your needs with the budget. There are several levels of bicycle fender material that you can choose from, ranging from plastic, alloy, to steel. The stronger the material, the more durable it is. The price is of course more expensive. However, my advice is to choose an alloy material that is quite durable. After all, Velo Orange alloy fenders, for example, only have a slight price difference compared to plastic fenders.
What is the best MTB fender brand
NCS Bontrager
The NCS Bontrager is the finest MTB Fenders 29er that I will cover in this article. This is ideal for those of you searching for low-cost accessories that are simple to install. Of course, it will look fantastic with your ultra-chic mountain bike. The NCS Bontrager can wrap tires ranging in size from 25mm to 45mm. Guaranteed, mud and grime will be perfectly blocked. Say goodbye to inconvenient winter driving.
We need to distinguish this fender by the presence of a pair of clamps neatly fastened to each holder. This allows you to change the length without having to trim the archery section by even an inch.
The NCS Bontrager is an alloy of full polycarbonate construction. Not an alloy layer between plastics. This is what makes this unit so strong and tough. Can be a long-term investment because you can use it for years. However, it has a very vulnerable installation. If it’s not neat, it will crack more easily than the other options.
Specifications summary
£44.99 / $59.99 / €54
Super easy to fit and adaptable
Neat rear light integration
Topeak rear mudguard
The 29″ Wheels XC11-29er is a lightweight removable rear fender designed for 29er mountain bikes to provide excellent mud/splash protection.
Multiple pivots make it easy to adjust the fender angle, and the quick-release clips adjust to fit ø25.4 – ø34.9mm seat posts.
Premium high-impact plastic is co-molded with a flexible trailing edge to resist impacts, while a highly polished fender bottom prevents dirt buildup in extremely muddy conditions.
Overall, the rear mudguard Mtb 29er is a great buy.
How to Install Fenders
You already have an MTB 29 mudguard, and now it’s time to install it. In fact, installing fenders is not difficult. However, if you install it wrong, this can cause friction to shocks that can cause your tires to become deer or at worst can make your front tires go over the bars (OTB).
Installation instructions will vary by type and brand of the fender, and you can read the instructions on their official website. Well, you should still follow the manufacturer’s instructions to avoid mistakes. Traditional-made fenders require a bit more work to install, so we’ll give you a little explanation.
- Remove the wheel where you will attach the fender.
- Starting with the front wheel, remove the brake caliper and remove it from the fork knob, screw the L-bracket mounting tabs into the holes you just removed the brake calipers (tighten only loosely), and attach the fenders to the tabs.
- Replace the wheels, and make sure that you align the fenders straight and equidistant from the surrounding tires.
- Tighten the fender on the mounting tab, then reinstall the brake caliper.
- Attach the stabilizer post to the fork or eyelet using the manufacturer’s instructions and hardware.
- Tighten everything in half at first, to give you enough wiggle room to adjust the stabilizer length and prevent the fenders from rubbing against the tires.
- Once adjusted, tighten everything.
- To repeat the process for the rear fender, you don’t need to remove the brake calipers as the rear ones are often designed to be fastened to the seat stay bridge.
- Remove the wheels and attach the L-bracket mounting tabs to the seat bridge.
- Some of the rear fenders even extend all the way down and need to be attached to the chainstay bridge.
- Align everything first, then tighten the bolts and supports.